1. Open a free Ecwid account
If you don't already own an Ecwid account you should open one for your business! You can set up your store for free, making sure every detail is ready for launch. Once you are ready to accept payments you can pick the plan that better fits your needs.
2. Account setup
If you are opening up an account for the first time, Ecwid has one of the best setup process I've ever seen. The system walks you through the entire process step by step.
When Ecwid asks if you have a website or Facebook page? Select the option Yes, I have a website, then select Other Platforms.
You don't need to copy any of the codes that the platform present you, all of this has already been done for you. Click on the button below that says Proceed to next step.
Enter the URL of your store page. Ecwid needs to know the location of your main store page. The goEcwid store page URL is https://yourdomain.com/store/. Change yourdomain.com with your own domain and proceeds to the next step.
3. Design Options
You completed the basic account setup of your store. Now you can head over to the Design tab in the sidebar and start editing the look of your store. Play with the beautiful options that Ecwid offers and remember that there are some more in the goEcwid project file.
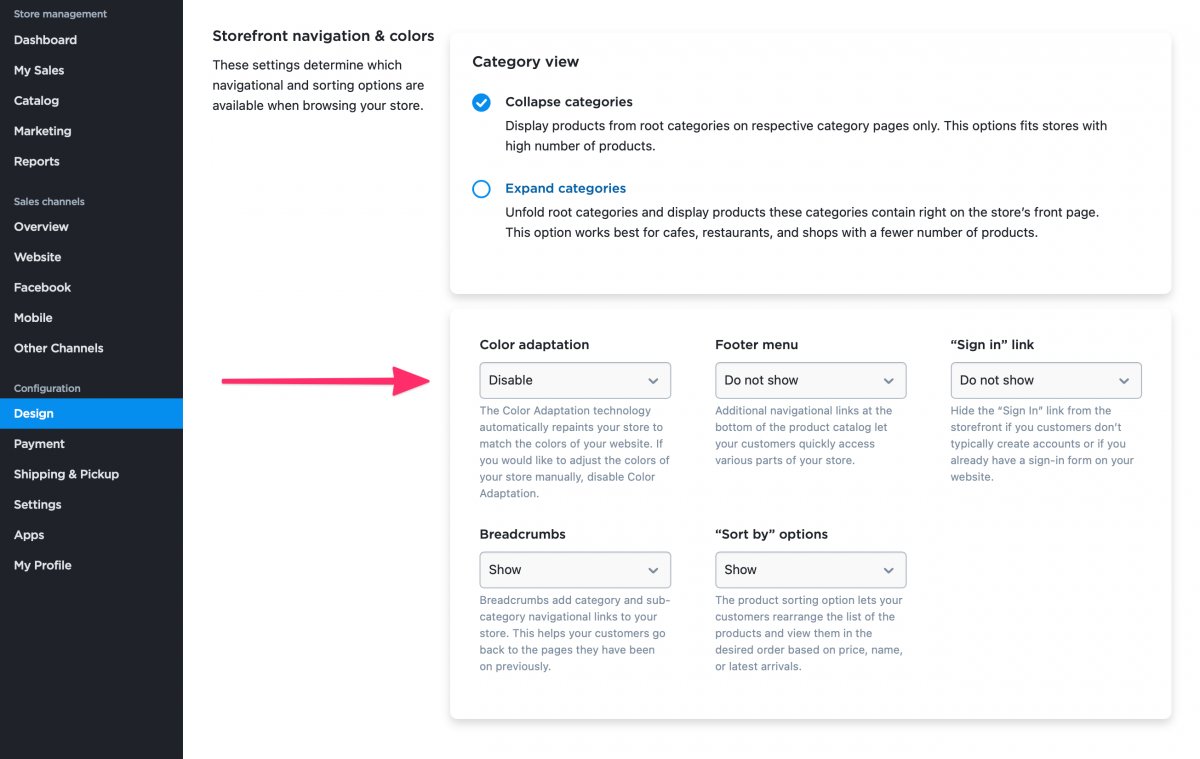
Almost at the bottom of that page you will find the Ecwid footer settings. The Ecwid footer offers limiting options, goEcwid doesn't need that footer. I would recommend setting up that area as follows (You can edit these settings at any point).

4. Connect your Ecwid account with goEcwid
Connecting your Ecwid account with goEcwid project file is as easy as it gets. After you have published your project file you only need your Ecwid Store ID. Read this to know how to find Ecwid Store ID and category ID.